
One of the best features on any property is a patio! This space is the perfect spot to catch up with friends over coffee, have evening barbeques with the family, and even complete some office work on your laptop during the day.
However, while a patio may seem like an overwhelming task to complete on your own, we have a simple, easy solution for making it possible — introducing the HEXpave Paving System! Before ripping up your yard, here’s what you’ll need to consider first:
Make Sure to Prepare the Ground
Before laying down your HEXpave, it’s essential to prepare the ground you’ll be working with. Here’s what to do:
- Step 1: Remove all large rocks and debris from the area. This is important because any abnormalities in the ground can prevent your grid from laying completely flat.
- Step 2: Next, once the ground is clear of any rocks, stones, and debris, compact your dirt or gravel sub-base as tight and flat as possible.
- Step 3: Before laying down your HEXpave, gently sprinkle the ground with some water. Doing this will help make your insulation a little easier.
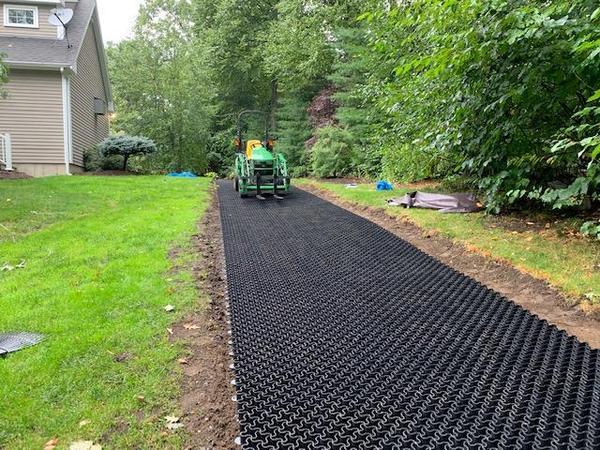
- Step 4: Finally, once complete, begin to place your pavers down.
Note: If you’re thinking about cutting your grid to fit, you can do this (it’s best to use a hand saw or a good table saw). However, just know that you will not be able to connect another grid to the cut side.
Connect the Pavers
Once your pavers are laid out to your liking, it’s time to connect them! While this might seem tedious at first glance, it’s relatively quick and straightforward to do. Here’s what to keep in mind:
- Step 1: There are two different ends on each grid — one is male, the other is female. When connecting the grids, you’ll want to insert the ends of the male clips into the female connection points.
- Step 2: To ensure that you’ve safely secured each grid, hold down one grid and pull the other up. When you hear a snap-like noise, that means you have successfully fastened the two grids together.
For more information on the connection and cutting process, please refer to our HEXpave Grid Installation Guide.
Anchoring is Optional
Before anchoring your HEXpave grids, it’s essential to know that this is an optional step — unless you’re creating a walking path on a slight incline (such as up a small hill) or on top of a grassy surface with empty grids. So since we’re creating a patio, anchoring won’t be necessary — it’s time to move onto filling!
Filling Your Grids
When it comes to filling your grid, it’s a relatively simple process to complete; there are a few different styles to choose from:
GravelIf you choose to overfill the grid with gravel, keep in mind that it will be loose and not compact within each grid. Also, when creating the overfilled look, we recommend the grid flush for a long-lasting installation.
SoilIf you’re looking to use soil, it’s imperative to fill each grid to the brim with soil. Once completed, plant your grass seeds, and you’ll be good to go.
SodNow, if you’re considering using sod, you’ll also want to fill each grid to the top with soil. After that has been completed, lay your sod strips on top.
No FillIf you choose not to fill your grids, that’s fine — you’re good to go! However, if your grids are lying on top of grass with no fill, you must anchor down your grid so that it is safe and secure (and not floating).
Easy-to-Install Lightweight Paving System
Vodalande has been manufacturing and designing our products for over 20 years. We provide top-of-the-line customer service, as well as high-quality products that will reinvent any environment they’re placed in. Contact us today for more information, or visit our website to place an order!

Leave a comment
This site is protected by hCaptcha and the hCaptcha Privacy Policy and Terms of Service apply.