
Key Takeaways:
- A drainage system that passes inspection can still fail. Most problems develop after the project is signed off and real conditions take over.
-
Slope and base preparation are the two most common points of failure, and both are entirely preventable with proper installation practice.
-
Material selection matters as much as system design. The wrong material in the wrong environment degrades faster than most homeowners expect.
-
Where the water goes after it leaves the drain is just as important as how it enters.
Passing inspection feels like the finish line. The drain is in, the concrete is cured, the grate is seated, and someone with a clipboard has signed off on it. But drainage systems don't get tested by an inspector walking the site on a dry afternoon. They get tested by the first heavy rain after installation, and then every storm after that for years.
The failures that show up six months or two years later almost always trace back to decisions made during the installation itself. Here are the six most common reasons drainage systems fail after inspection, and what to do at each stage to make sure yours isn't one of them.
1. Improper Slope
Gravity does the work in any drainage system, but only if the system is built to use it. A channel or pipe that isn't correctly sloped toward the outlet moves water slowly, partially, or not at all.
Water that doesn't drain completely promotes sediment buildup, and in freeze-thaw climates, freezes and expands, damaging the system from the inside. Slope errors are easy to make and hard to catch on a dry inspection day.
How to avoid it: Verify slope at every stage of installation, not just at the end. The minimum for most channel systems is one inch per eight feet toward the outlet. If your site doesn't provide reliable natural grade, a pre-sloped channel system builds the gradient into the product itself, removing dependence on field conditions.
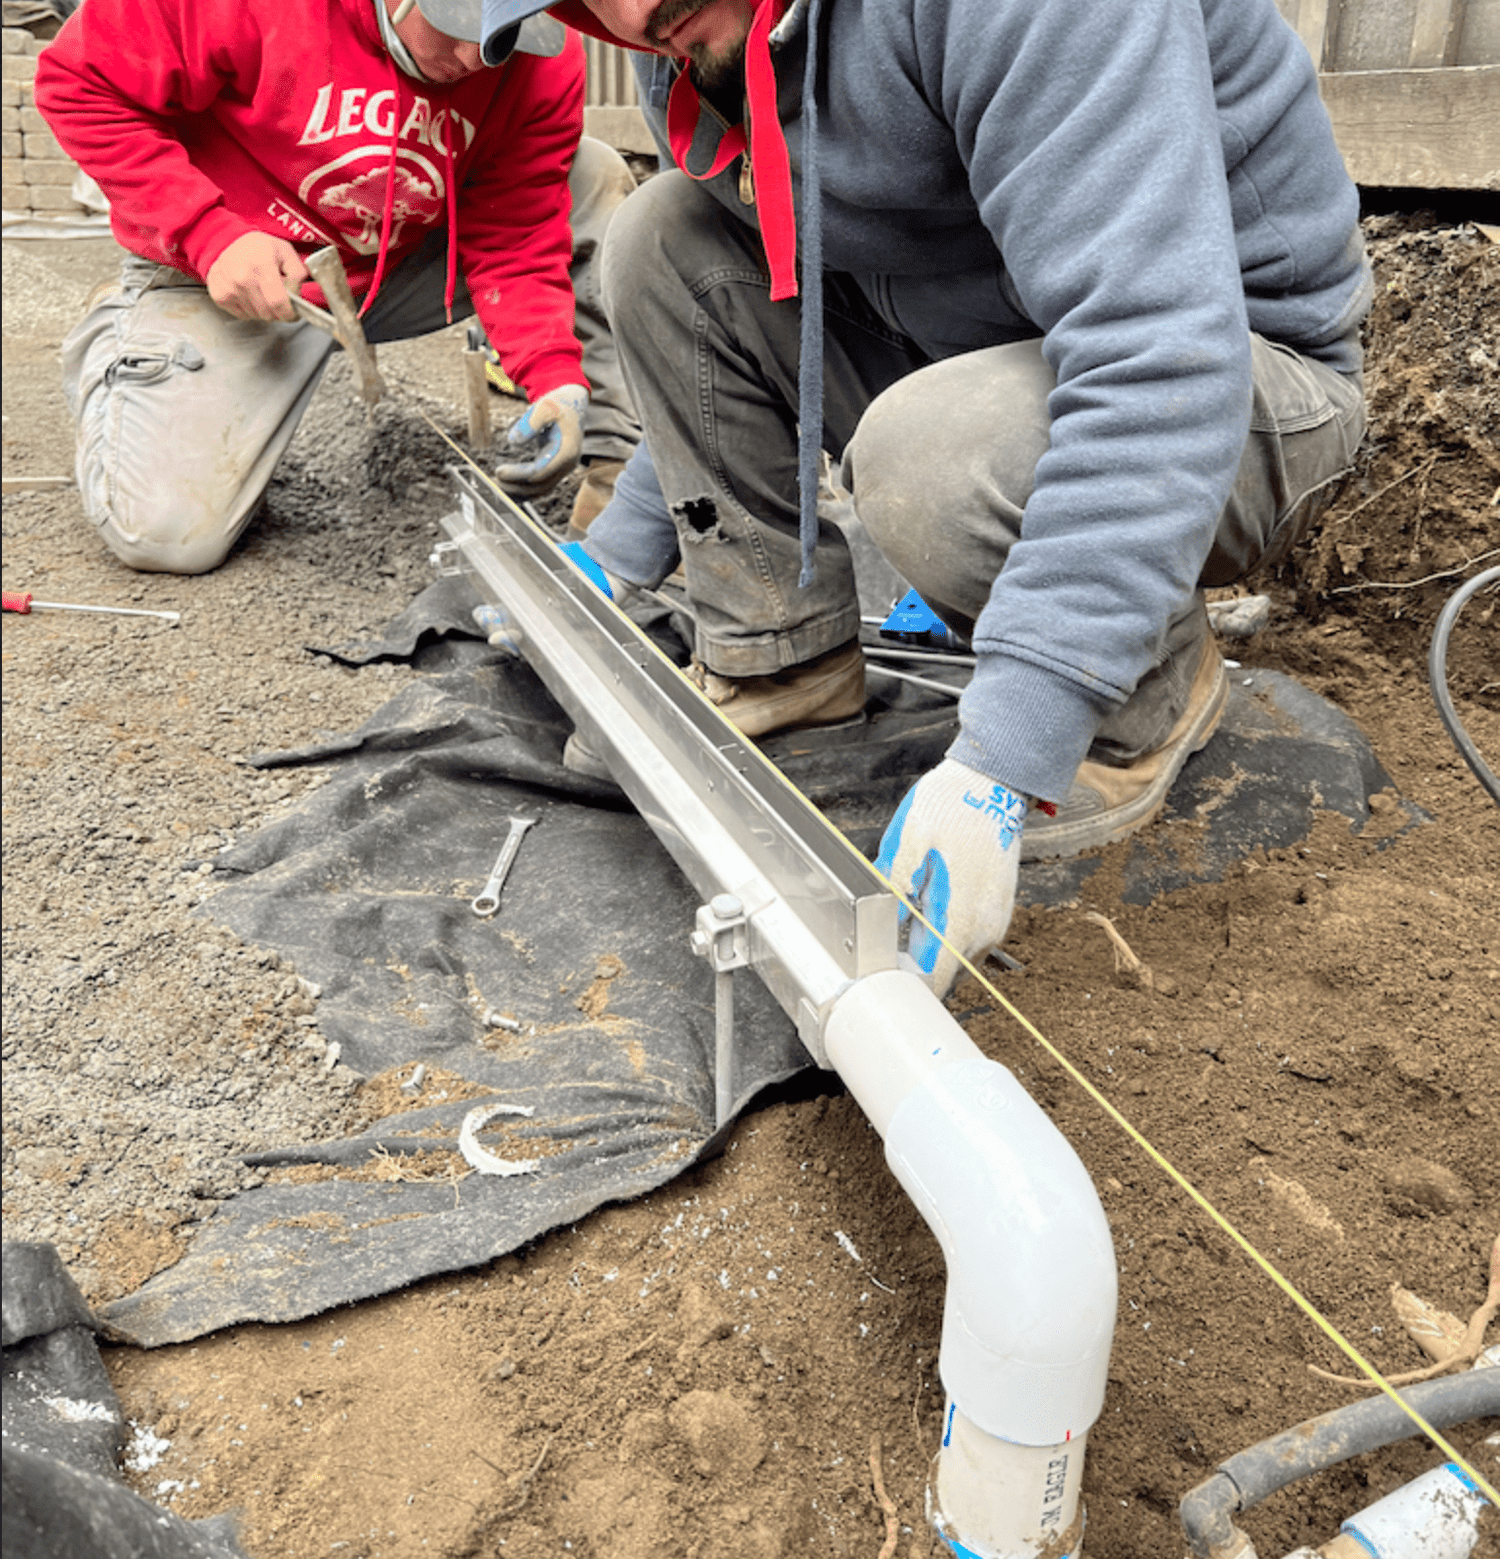
2. Poor Base Preparation
The concrete base beneath a drainage channel is what keeps it stable and load-bearing over its lifetime. A channel that isn't properly bedded will shift, settle unevenly, and cause joints to separate. By the time these symptoms are visible, the system often needs partial or full reinstallation.
How to avoid it: Excavate to the correct depth (channel depth plus a minimum three to four inch concrete bed). Compact the sub-base, set the channel into wet concrete, and pour surround on both sides flush with the drain frame. Don't load the system before the concrete has fully cured. This step is invisible once the project is finished, which is exactly why it can't be rushed.
3. Clog Risk
A system that isn't designed with debris management in mind will clog. Leaves, sediment, and organic material accumulate in channels and outlet pipes over time, restricting flow and eventually causing backups. The system is clean at inspection; the failure shows up a year later when buildup goes unnoticed long enough to cause damage.
How to avoid it: Specify systems with removable grates for inspection and cleanout access. In applications near trees or landscaping, debris baskets at inlet points capture material before it enters the pipe run. A brief annual inspection and flush prevents the kind of slow-building blockage that leads to system failure.
4. Wrong Material for the Environment
Not every drainage product is built for every environment. A system specified for light residential use won't hold up under vehicle traffic. A channel without UV stabilization degrades faster in high-sun exposure. A grate material that performs well in a dry climate may corrode significantly faster in a coastal environment. These failures develop gradually and are never visible at inspection.
How to avoid it: Match material specification to the actual demands of the site. For trafficked surfaces, confirm load class ratings meet or exceed expected vehicle weight. In coastal or chemically exposed environments, specify stainless steel or polymer over galvanized. Confirm UV stabilization for high-exposure applications. The environment the system will live in matters more than the general application category.
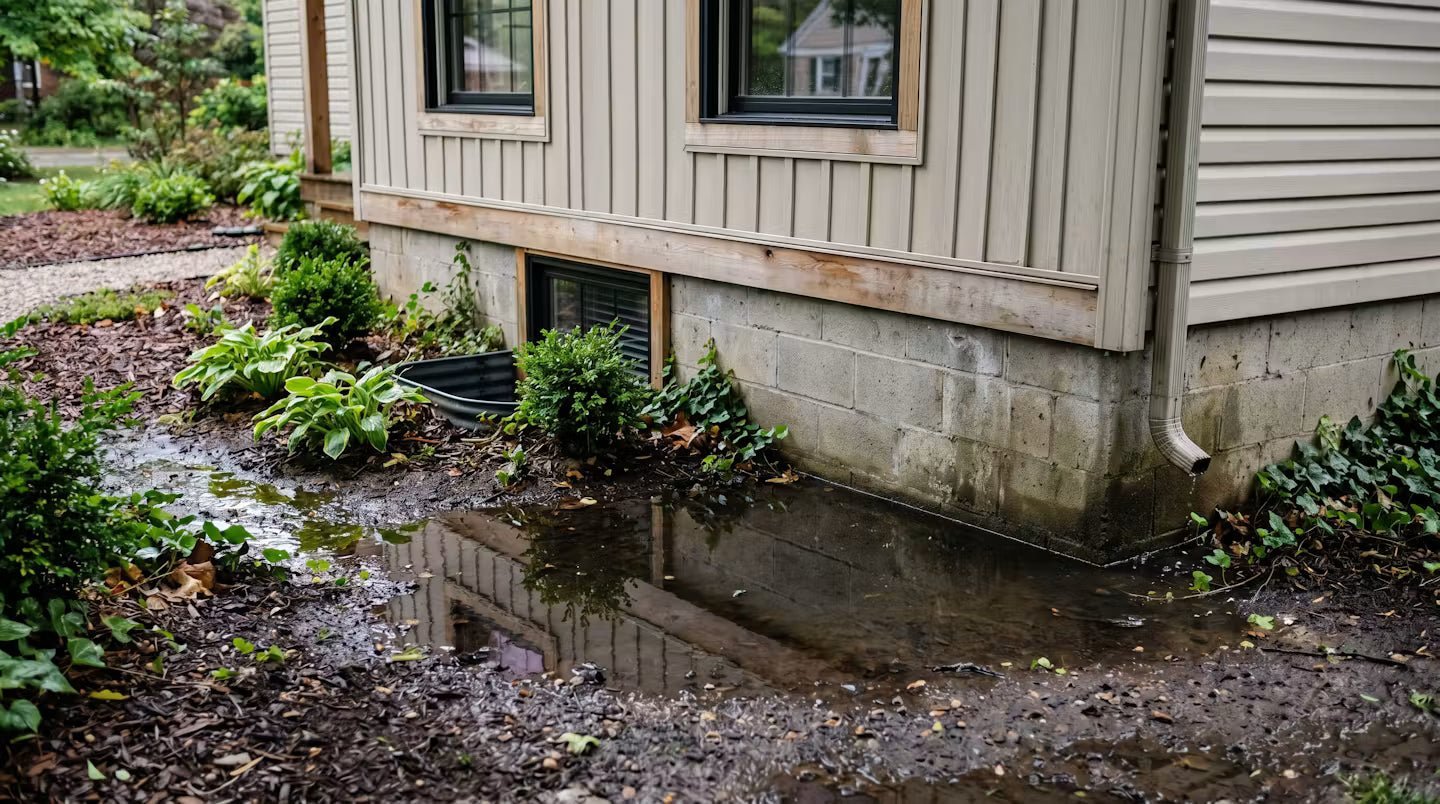
5. No Clear Outlet Plan
A drainage system that collects water efficiently but has nowhere to send it just relocates the problem. Outlet pipes that terminate too close to the structure, discharge into areas that pool, or connect to systems that can't handle peak volume will back up—and the collected water has to go somewhere. Usually back the way it came.
This failure passes inspection because the drain itself is correctly installed. The problem is what happens downstream.
How to avoid it: Plan the full water path before installation begins — from where water enters the drain to where it exits the property. Confirm the outlet can handle peak flow, the pipe run maintains consistent downward slope, and the discharge point doesn't create a new pooling problem somewhere else.
6. Improper Installation
Even a well-specified system will underperform if it isn't assembled correctly. Channels that aren't properly joined allow water to escape into the surrounding base. Grates that aren't secured shift under traffic. Sealant gaps at joints allow groundwater infiltration that introduces sediment and degrades performance over time.
These are details that are easy to overlook under schedule pressure and impossible to assess after the concrete is poured.
How to avoid it: Use the full range of components the system is designed around. Installation brackets hold channel sections in position during the concrete pour, keeping joints aligned before the surround sets. Sealant at channel joints prevents water from escaping laterally and stops groundwater from entering the system. Grate Tape or locking mechanisms keep grates secured under repeated load.
These are what separates a system that performs correctly from one that looked right at inspection and failed in use.
Build It Right the First Time. Inspection Is Just the Beginning.
Every failure covered here is preventable with the right specification, materials, and installation process. They're common precisely because they're invisible at completion, developing under load, over time, and in weather.
Get the slope right, prep the base properly, plan the outlet, match the material to the environment, and install the system completely. Do those things and your drainage system will still be performing correctly long after the inspection paperwork is filed.
Reach out to a Vodaland Clean World Designer for assistance with your next project HERE.
Leave a comment
This site is protected by hCaptcha and the hCaptcha Privacy Policy and Terms of Service apply.